Configure a Headless Raspberry Pi for Networking
If you use a small computing platform like Raspberry Pi or Raspberry Pi Zero for demonstrations, or you just want to get one working out in the field, you can face a problem. You probably didn't lug a gigantic monitor with you, or even a keyboard or mouse. You've just got your laptop. The Raspberry Pi will be working "headless", like a tiny server.
Now, it's straightforward to use the SSH command to connect a command window on the laptop to one of these headless devices once they're connected to the local WiFi. But to get it on the network you first need to tell the device the SSID and password for the Wifi. And for that you need to be logged in through the laptop. Hmmm.
Here’s a detailed step-by-step to get your Pi Zero on Wi-Fi and accessible via SSH. You'll need a Raspberry Pi or Raspberry Pi Zero, and a Micro SD card. If you don't care about the data on the current SD card in the device you can just use that and write over the top of it. You may also need an adapter if your laptop doesn't have a Micro SD slot. Finally you'll need to obtain the SSID and password of the Wi-Fi network.
If needed, install Raspberry Pi Imager on your laptop. Next, you need to run the imager application. You get to choose the target device and operating system. For example, if you have a Raspberry Pi Zero 2 and want to install the Lite version of Raspberry Pi OS, it would look like this:
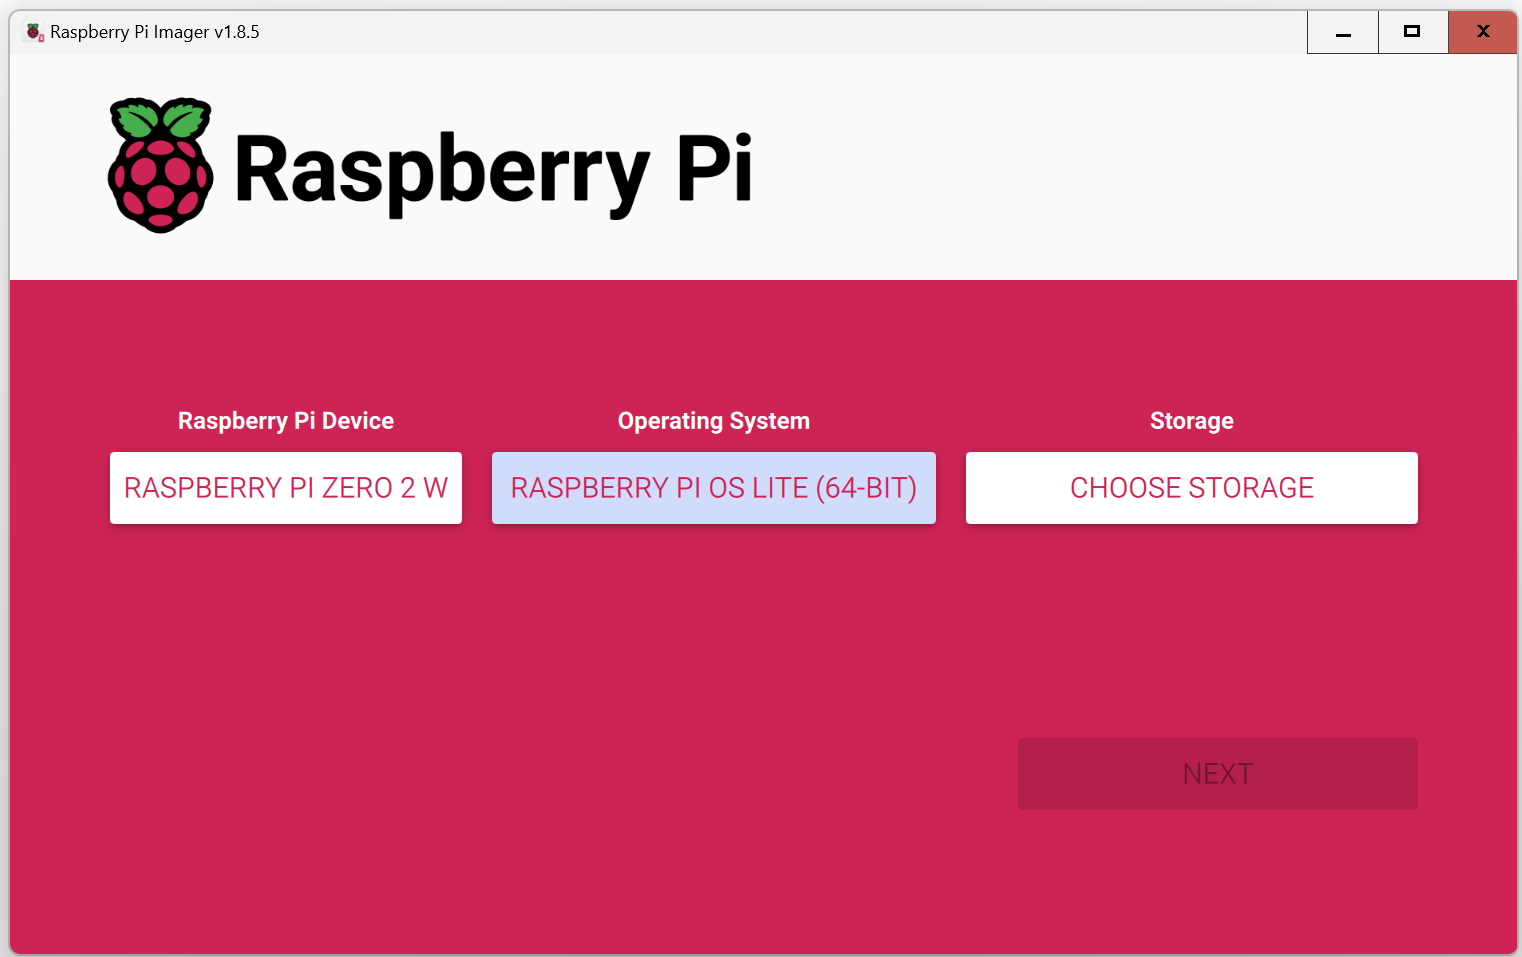
Next, insert the Micro SD card into your computer, then click on CHOOSE STORAGE and select it as the storage device. Take care here, as whatever you select will get reformatted as part of the process. Be sure to choose the card and not your hard disk!
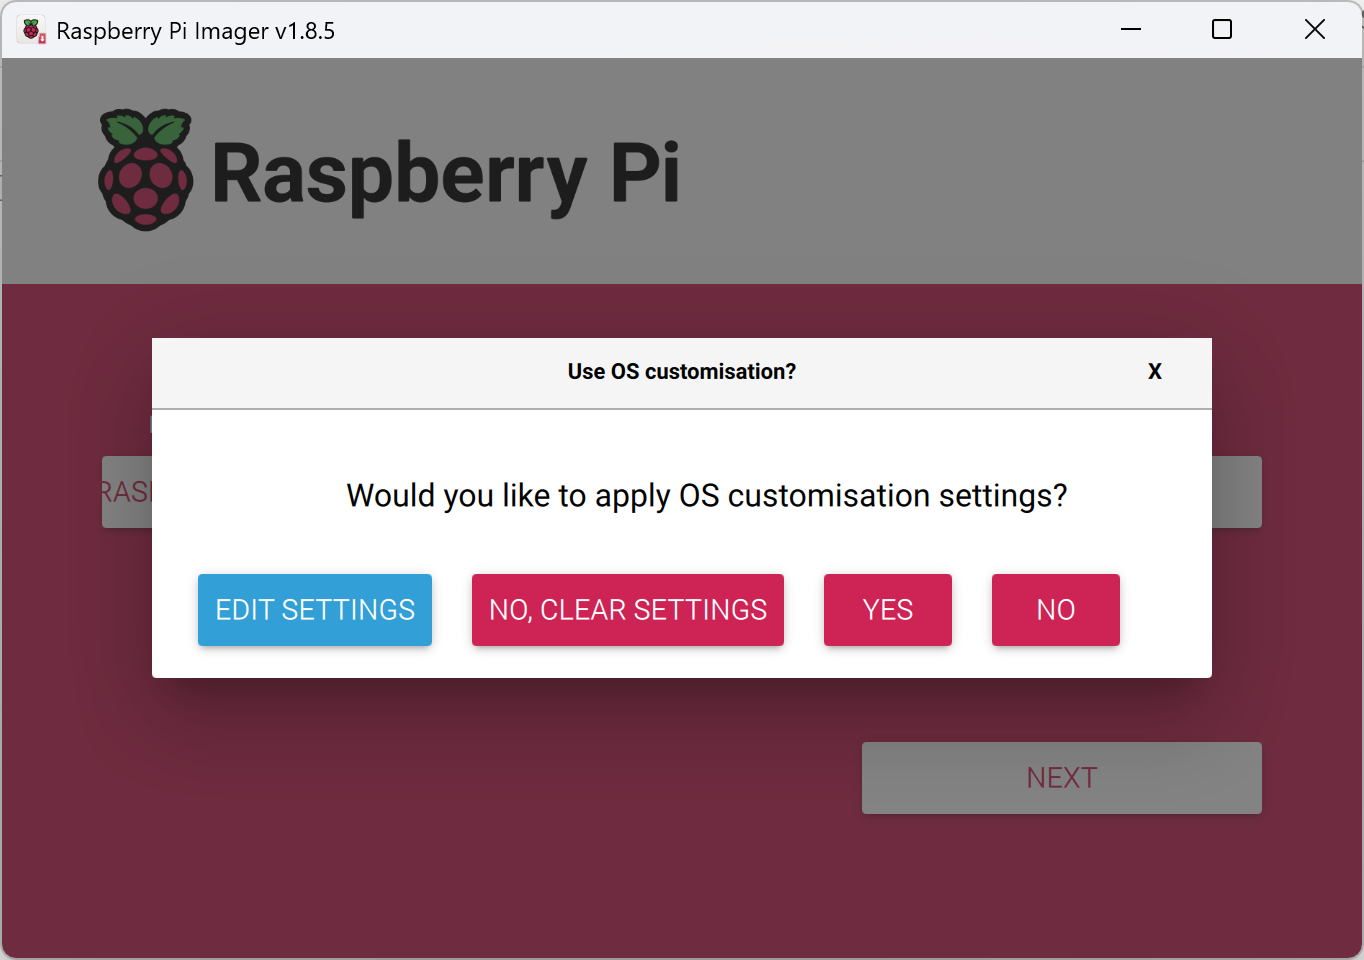
Once you've selected the storage device, choose NEXT. At this point you'll be offered the chance to edit your settings, clear them, or ignore them. Click on EDIT SETTINGS to bring up the OS Customisation dialog, which has three tabs.
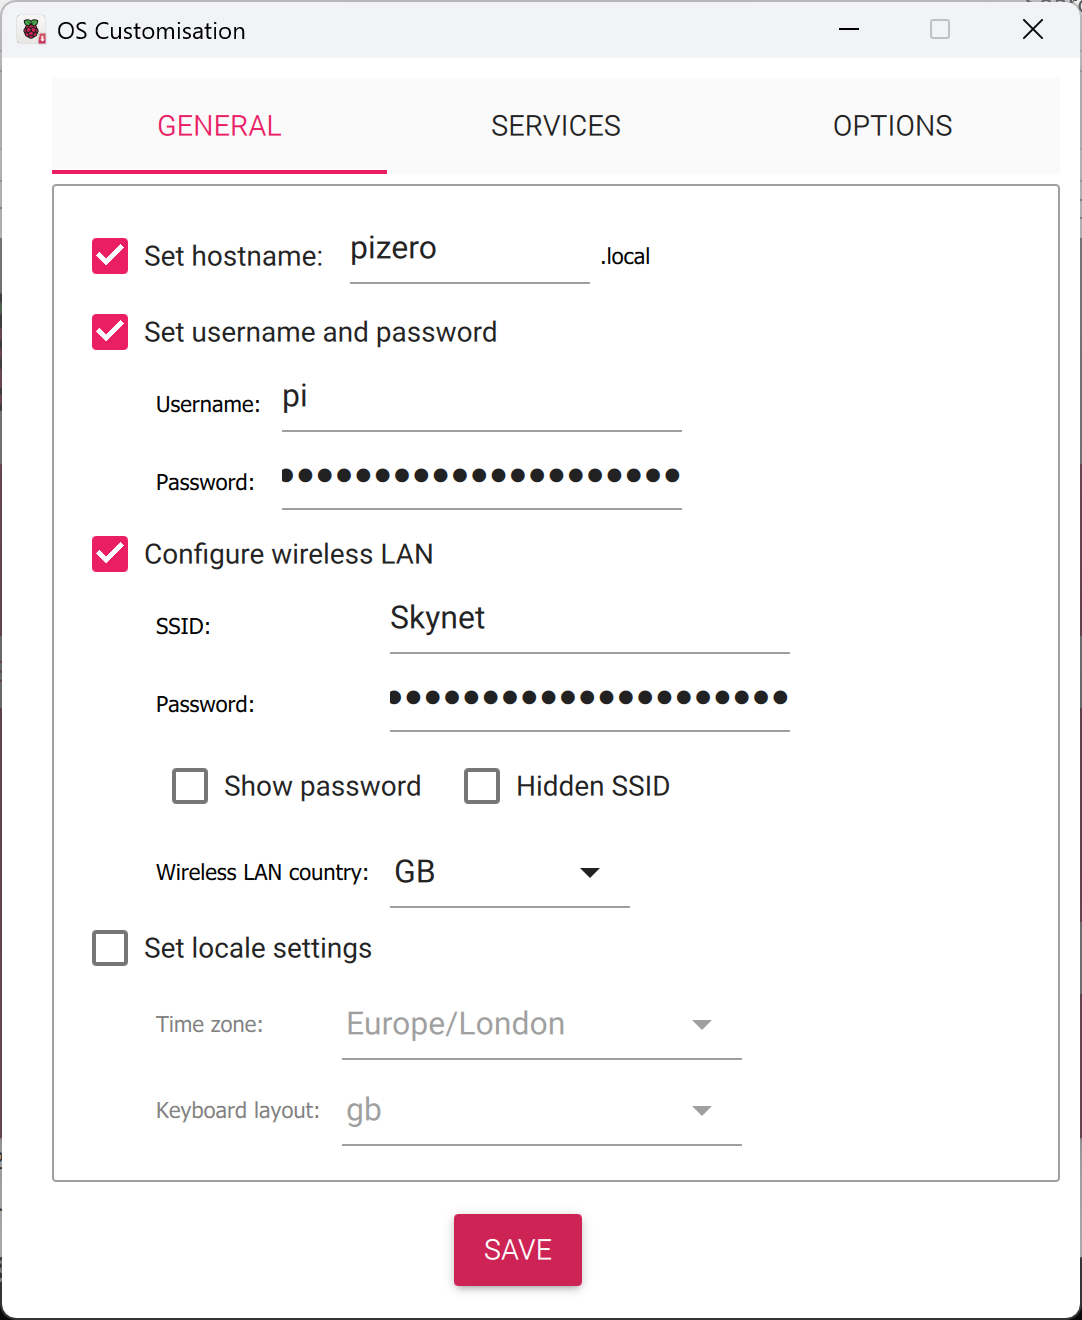
On the first tab, GENERAL, you can set the hostname. You could leave this at the default "raspberrypi", but this would make it very difficult to find the device using DNS if there are other Raspberry Pi devices on the network with this default name, so instead change it to something like pizero2 and make a note of it. Next, set a username and password, again not using the default values because that would be silly and very insecure. Finally on this tab, set the WiFi SSID and Password. If these aren't correct, the device won't be able to connect to the network.
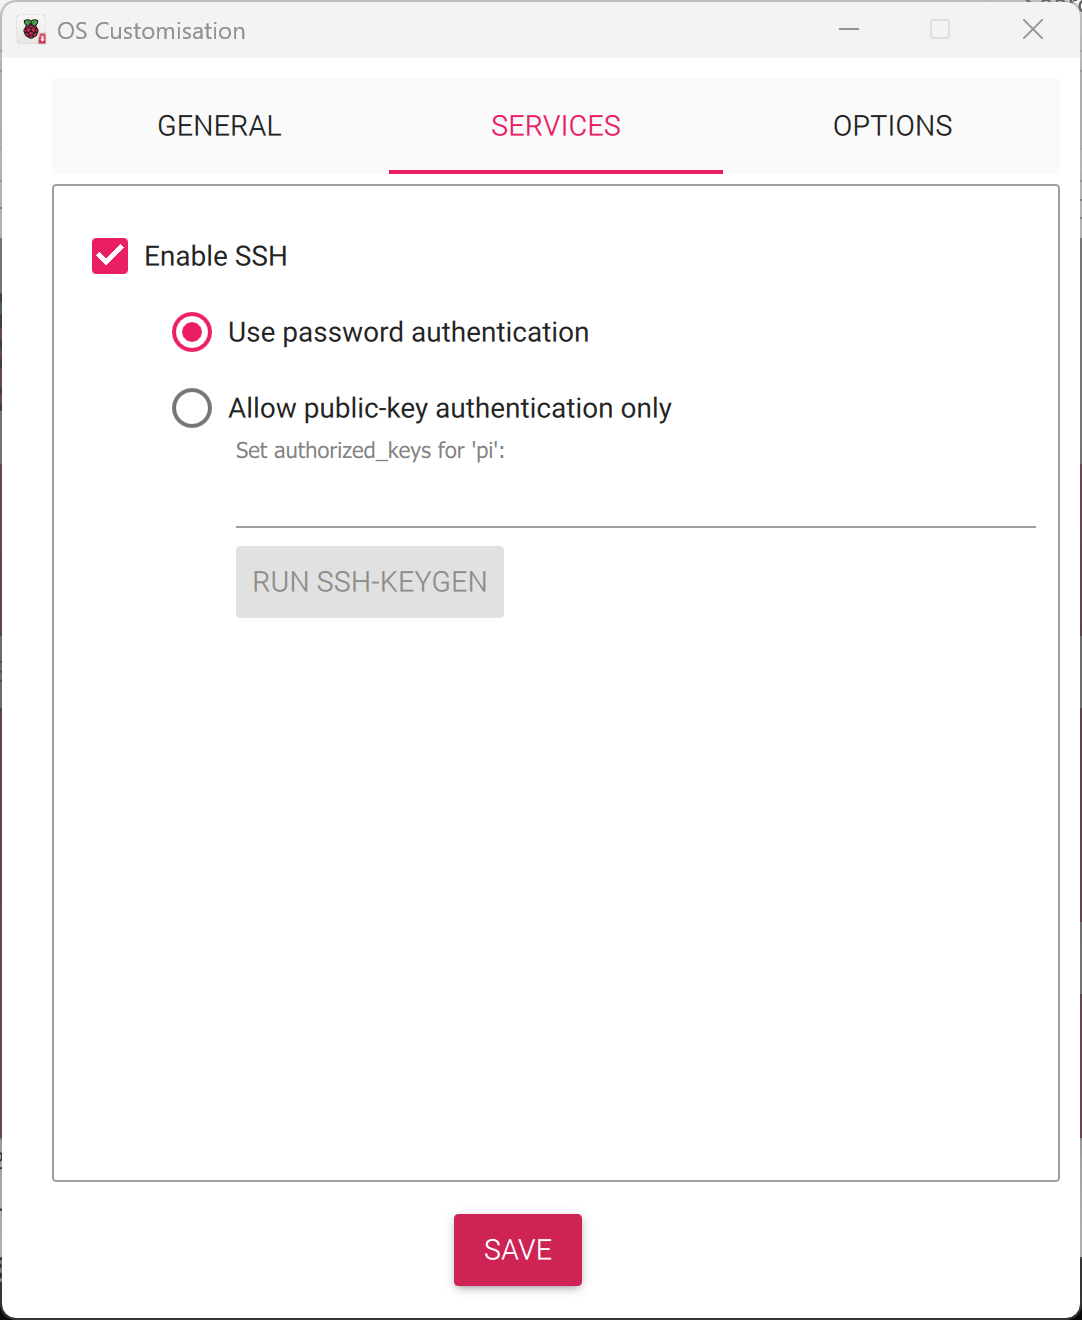
On the second tab, SERVICES, make sure to enable SSH. You can select password authentication for any kind of demo situation because it's easy to use. For a production scenario you should use public-key authentication for better security. You can leave the third OPTIONS tab at the default values. Click SAVE, and then in the dialog box click on YES to apply the customisations.
You will be warned that the card will be erased - click YES. This will start the copying process. You might get a warning or two from Windows about the card needing to be formatted or being invalid. You should be able to just dismiss those messages and the copy should be carrying on regardless in the background. It might take a minute or two depending on which OS version you chose. When it finishes you can click on CONTINUE. We are now done with the imager tool.
By default, the tool ejects (i.e. unmounts) the card at the end of the copying process. You can now remove the card from the computer and put it in the Raspberry Pi. Power up the Raspberry Pi and wait a minute or two for it to start up, bearing in mind that the first boot-up might take a little longer than subsequent ones. Because we are running the computer headless, we can't see the details of the boot process, but we can get a feel for when it is done by the flashing of the power light on the device.
From your computer, open a command window and type:
ssh username@hostname
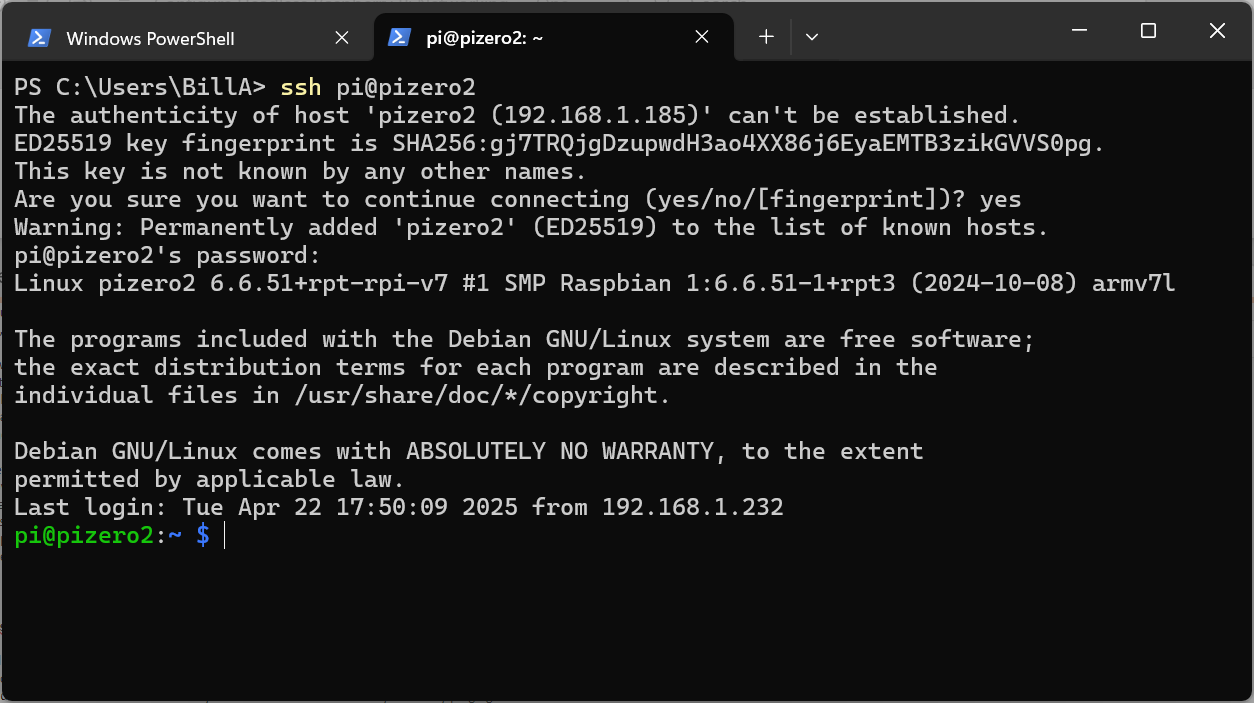
You'll need to replace username and hostname (e.g. pizero2, without the .local) with the values you gave on the GENERAL tab of the OS Customisation dialog. DNS or DHCP or something should be able to find the device from the hostname. If you want to find its IP address you can try pinging the hostname from the command line (or hostname.local), or use the command ip addr once logged in. If this is the first time you've attempted to ssh to this host, you'll be asked to confirm that you want to add it to the list of known hosts. You'll then be prompted for the password to log in.

